Kitchen Renovations (Part 2)

Last month we shared some photos of first kitchen improvements, and I’m really happy to share some photos of the completed cupboards now. This is where we started:

“The Before”, and “The Plan”

20161228_094102

I made sure to do thin coats of primer this time, as it drooped a bit when I did the white cupboards on top.

20161229_123719-01

A close up shot of the insides and outsides

20170101_142631-01

All done!

I really like how the grey makes the oven blend in. It was also a great opportunity to Silvo all the handles. Part 3 of the Kitchen Renovations will be to make the ceiling panels white as I shared in a mock-up image early in December.

Making Light from Rocks

A few years ago we sponsored an Indiegogo crowdfunding campaign for something called GravityLight. It is a most amazing invention, which flies over the hurdles of other renewable light sources. Mainly, when you think of renewable or sustainable light, you’ll think of solar. Solar is great, and we love ideas like solar roadways and roof tiles. However, what GravityLight brings to the world is accessibility at a poverty-level. When the sun isn’t shining (i.e. when you need light), there’s no solar power, unless you have a battery to store what was collected in the daytime. Batteries and solar panels can be pricey though. So, GravityLight has pitched their market as those areas where kerosene lamps are posing financial burdens and fire and health threats to people.

As a perk for our contribution, they sent us a GravityLight. It took really long, because they were using the crowdfunds for setting up a factory. Nevertheless, it was so great to finally open the box when it arrived last Monday. The Kenyan factory is up and running, and their roadshow has kicked off the sales to people there.img_20161128_181156

How does it work?

GravityLight uses the power of gravity to turn cogs and gears and power a little motor. More technically, there are probably more accurate terms for the parts, but that’s the idea. It turns potential energy (remember that from school), into kinetic energy (thanks, Earth), and then into electrical energy. A tiny LED casts 15 lumens of light into your room.

It’s really amazing. The box contains the main light with all the beaded strings already installed (think of these like chains that drive the whole thing), a weight bag to be filled with sand or stones, and two SatLights – extensions that can be daisychained from the main light to provide focused light on a workspace.20161128_195929

With the help of my son, we filled some paper bags with gravel and filled the weight bag, and were filled with wonder when the LED lit up. In our suburban flat it easily provides enough light to avoid walking into things, and I was able to use the SatLight to study by. With a 20-minute lighting drop, it was also a pretty useful indicator for a brief study break, to stand up, stretch and pull the weight up again. It is really easy lifting, thanks to a clever application of ancient physics in the pulley effect.

I’m now starting intentional conversations to get others excited, and hopefully get this into people’s homes as either a primary source of light (conquering a dependence on kerosen/paraffin lamps) or as an emergency backup in case of loadshedding and power outages. If you can help me get this to where it needs to be, please get in touch.

IMG_20161128_195205.jpg

Kitchen Renovations (Part 1)

Our kitchen was a little dark, and we wanted to spruce it up a bit. We had a tin of paint leftover from our cot and bench projects, so I decided to give it a go. I also found a tin of good intentions in the form of a wood and tile primer from 2013.

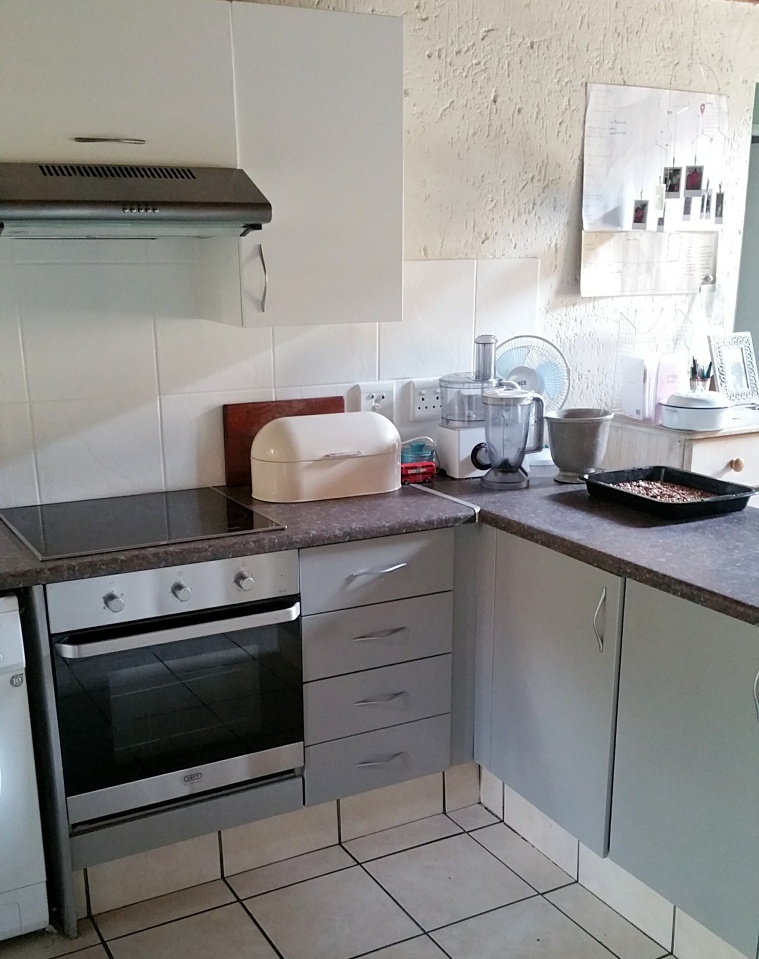
Being partial to great technology, I opened my Sketchbook app and came up with a mock-up that approximated some of Sarah’s kitchen Pinterest board. Here’s the before shot, and the mock-up plan:

20161103_200214

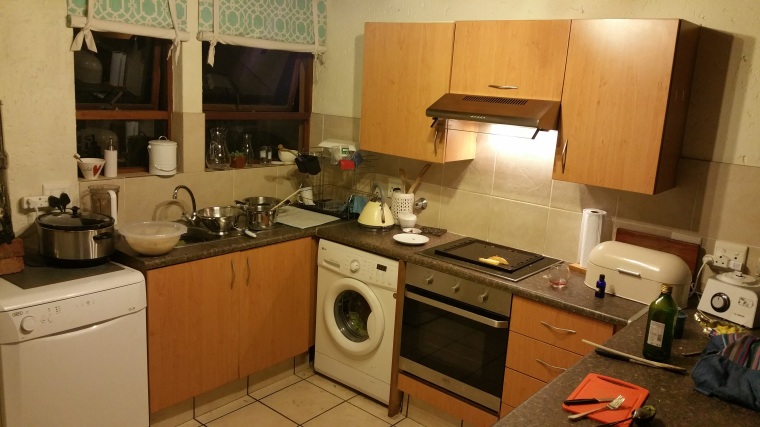
Before: Pretend we made it extra messy, like those sad grey infomercial shots.

2016-11-12-13-56-06

The Plan: White above and grey below, gives a rough idea of what we were aiming for

So, with our baby’s delivery date safely  far in the future (or so we thought), I got to preparing the surfaces.

The primer was quite drippy, so the finish isn’t perfect, but two coats with sanding between got us to an already lighter space which seemed a lot roomier. I’d say it breathed better, but for the dizzying fumes.

It was a successful weekend job so far, with intentions to do the final paint layer on the following Tuesday evening. Well, I caught a mild bug and decided to put off the labour til Thursday. When Thursday came along, our baby decided it was time for a different type of labour. We spent the night at the hospital and my champion wife laboured hard, with the help of some really excellent medical experts. Our baby girl was born on Friday morning.

Back home, my son and I held the fort, and waited for the girls to come home. I say “waited” but it wasn’t idle time – I mean there wasn’t even time to pick up a paintbrush.

However, in the new week, paternity leave gave me some time while my boy was at school at the ladies rested. Carpe Diem, so they say. Here’s the result:

20161115_060257

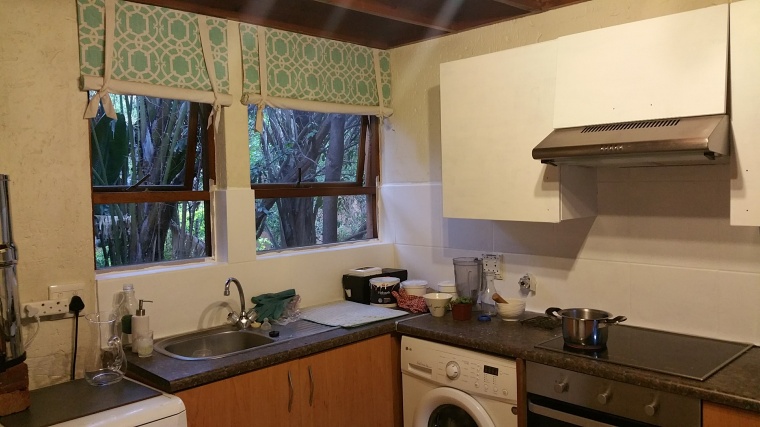
After: Tiles and top cupboards a nice shiny white.

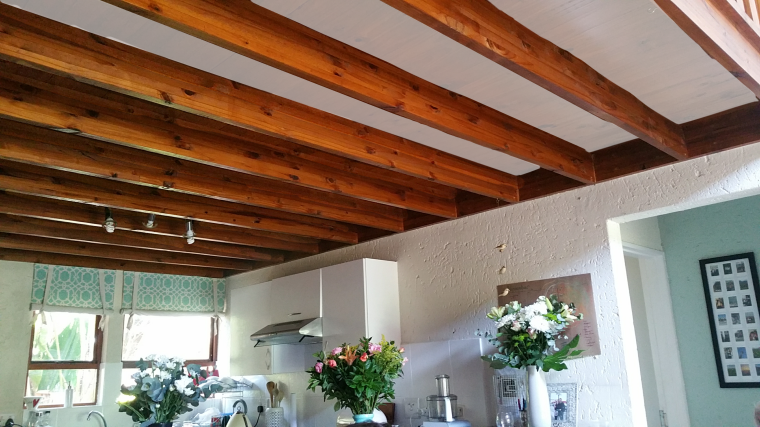
We are really pleased with it. So, what’s next? Well, the walls need a fresh and lighter coat, in keeping with the plan, and we need to go choose a grey for the bottom cupboards. The walls are deeply textured and take a lot of paint, but we’ll take the plunge soon. Beyond that, here’s a sneak peek of the next intention, which is to paint the ceiling. The pictures also happens to show off the new light feel of the cupboards. It really is encouraging to see what a difference a bit of DIY can make, especially if the cost of buying the paint happened a long time ago!

sketch1480145963680.png

The ceiling is all wood, and we’d like to paint the inside panels. Just look how well the colours of the room work now, especially with all those maternity flowers!